Astrocut Documentation
Astrocut is a powerful Python package for generating cutouts from sets of astronomical images with overlapping footprints.
It supports both two-dimensional images and three-dimensional image cubes, making it versatile for a wide range of astronomical data. Astrocut is compatible with multiple file formats, including FITS, ASDF, and TESS full-frame images. Beyond cutout extraction, the package includes features for post-processing, such as aligning cutouts along a path and combining multiple cutouts for enhanced analysis.
Astrocut is actively maintained and continuously evolving to support the needs of the astronomical community.
Image Cutouts
Astrocut can generate cutouts of image data from FITS and ASDF files using the FITSCutout and ASDFCutout classes, respectively.
The package supports both single and multiple cutouts, allowing users to extract data from a single image or multiple images with overlapping footprints.
Both image cutout classes take the following parameters:
input_files: A list of input image files in the expected format. These can be local file paths, URLs, or S3 URIs.coordinates: The coordinates at the center of the cutout.cutout_size: The size of the cutout in pixels or angular units.fill_value: If the cutout footprint falls outside of the image, this value will be used to fill the missing pixels.
FITS Cutouts
The Flexible Image Transport System (FITS) is a standard format for astronomical data. Astrocut can generate cutouts from FITS files and return the results in memory or as a written file, depending on the user’s preference. The cutout ‘~astropy.fits.io.HDUList’ object format is described in the Astrocut File Formats page.
To make a cutout from a FITS file or files, use the FITSCutout class.
>>> from astrocut import FITSCutout
>>> from astropy.coordinates import SkyCoord

>>> input_files = ["https://archive.stsci.edu/pub/hlsp/candels/cosmos/cos-tot/v1.0/hlsp_candels_hst_acs_cos-tot-sect23_f606w_v1.0_drz.fits",
...                "https://archive.stsci.edu/pub/hlsp/candels/cosmos/cos-tot/v1.0/hlsp_candels_hst_acs_cos-tot-sect23_f814w_v1.0_drz.fits"]

>>> center_coord = SkyCoord("150.0945 2.38681", unit="deg")
>>> cutout_size = [200, 300]
>>> fits_cutout = FITSCutout(input_files=input_files,
...                          coordinates=center_coord,
...                          cutout_size=cutout_size,
...                          single_outfile=True)
The resulting FITSCutout object can be used to access the cutout data and metadata. The cutouts_by_file attribute is a dictionary that
stores the individual cutouts as a list of CutoutInstance objects by input filename. The CutoutInstance
object contains the cutout data, shape, world coordinate system (WCS) and other helpful properties.
The hdu_cutouts_by_file attribute is a dictionary that stores the cutouts as a list of ImageHDU objects by input filename.
These objects can be used to access cutout data and metadata in the HDU header.
The fits_cutouts attribute is a list of cutouts as HDUList objects. The single_outfile parameter decides whether all the cutouts
will be written to a single HDUList object or to separate objects. When single_outfile is set to True,
a single HDUList object will contain all the cutouts.
>>> cutout = fits_cutout.fits_cutouts[0]
>>> cutout.info()
Filename: (No file associated with this HDUList)
No.    Name      Ver    Type      Cards   Dimensions   Format
  0  PRIMARY       1 PrimaryHDU       9   ()
  1  CUTOUT        1 ImageHDU      2767   (200, 300)   float32
  2  CUTOUT        1 ImageHDU      3343   (200, 300)   float32
To write the cutouts and their metadata to FITS files, use the write_as_fits method. This method returns a list of paths to the
cutout FITS files.
>>> from astropy.io import fits

>>> path = fits_cutout.write_as_fits()
>>> print(path)
['cutout_150.0945000_2.3868100_200-x-300_astrocut.fits']

>>> with fits.open(path[0]) as hdul:
...     hdul.info()
Filename: cutout_150.0945000_2.3868100_200-x-300_astrocut.fits
No.    Name      Ver    Type      Cards   Dimensions   Format
  0  PRIMARY       1 PrimaryHDU      11   ()
  1  CUTOUT        1 ImageHDU      2769   (200, 300)   float32
  2  CUTOUT        1 ImageHDU      3345   (200, 300)   float32
By default, the cutouts are written to the current working directory. You can specify a different output directory using the output_dir parameter.
You can also set the prefix of the cutout file paths using the cutout_prefix parameter. The default value is “cutout”.
ASDF Cutouts
The Advanced Scientific Data Format (ASDF) is a flexible format for storing scientific data. Astrocut can generate cutouts from ASDF files and return the results in memory or as a written file, depending on the user’s preference. The cutout ASDF file format is described in the Astrocut File Formats page.
To make a cutout from an ASDF file or files, use the ASDFCutout class.
>>> from astrocut import ASDFCutout
>>> from astropy.coordinates import SkyCoord

>>> input_files = [""]  # Path(s) to local ASDF file, URL, or S3 URI

>>> center_coord = SkyCoord("80.15189743 29.74561219", unit="deg")
>>> cutout_size = 25
>>> asdf_cutout = ASDFCutout(input_files=input_files,
...                          coordinates=center_coord,
...                          cutout_size=cutout_size)
Warning
Due to the symmetry of the pixel grid, odd values for cutout_size generally produce
cutouts that are more accurately centered on the target coordinates than even values
for cutout_size.
The resulting ASDFCutout object can be used to access the cutout science data and metadata. The cutouts_by_file attribute is a dictionary that
stores the individual science data cutouts as a list of Cutout2D objects by input filename. The Cutout2D
object contains the science cutout data, shape, world coordinate system (WCS) and other helpful properties. The cutouts attribute is a list of
science data cutouts as Cutout2D objects, one for each input file.
The asdf_cutouts attribute is a list of cutouts as AsdfFile objects, and the fits_cutout attribute is a list of cutouts as
HDUList objects. The cutout objects in these lists can be used to access cutout data and metadata, as shown below.
Note
Although Astrocut supports writing ASDF cutouts as FITS objects, we recommend using the ASDF output format whenever possible. FITS files may not accurately represent the ASDF world coordinate system, so saving cutouts in their original format will generally give the most reliable results.
>>> cutout_asdf = asdf_cutout.asdf_cutouts[0]
>>> cutout_asdf.info()
root (AsdfObject)
└─roman (dict)
  ├─meta (dict)
  │ └─wcs (WCS)
  └─data (ndarray): shape=(25, 25), dtype=float32

>>> cutout_fits = asdf_cutout.fits_cutouts[0]
>>> cutout_fits.info()
Filename: (No file associated with this HDUList)
No.    Name      Ver    Type      Cards   Dimensions   Format
  0  PRIMARY       1 PrimaryHDU      11   ()
  1  CUTOUT        1 ImageHDU        67   (25, 25)   float32
  2  ASDF          1 BinTableHDU     13   1R x 1C   ['36470B']
To write the cutouts and their metadata to ASDF files, use the write_as_asdf method. This method returns a list of paths to the
cutout ASDF files.
>>> import asdf

>>> path = asdf_cutout.write_as_asdf()

>>> with asdf.open(path[0]) as af:
...     print(af['roman']['data'].shape)
(25, 25)
To write the cutouts and their metadata to FITS files, use the write_as_fits method. This method returns a list of paths to the
cutout FITS files.
>>> from astropy.io import fits

>>> path = asdf_cutout.write_as_fits()

>>> with fits.open(path[0]) as hdul:
...     hdul.info()
Filename: r0099101001001001001_F158_visit_r274dp63x31y81_i2d_269.6970000_66.0450000_25-x-25_astrocut.fits
No.    Name      Ver    Type      Cards   Dimensions   Format
  0  PRIMARY       1 PrimaryHDU      11   ()
  1  CUTOUT        1 ImageHDU        67   (25, 25)   float32
  2  ASDF          1 BinTableHDU     13   1R x 1C   [36470B]
By default, the cutouts are written to the current working directory. You can specify a different output directory using the output_dir parameter
in either of the write functions.
Lite Mode
By default, ASDFCutout creates lite cutouts that include only the science data array and the updated world coordinate system. These cutouts
can be accessed through the asdf_cutouts attribute.
If you need the full ASDF tree, including other arrays in the input file (e.g., data, error, uncertainty, variance, etc.) and the original metadata,
set the lite parameter to False. This produces larger cutouts, but preserves the full set of arrays and metadata for downstream analysis.
>>> asdf_cutout_full = ASDFCutout(input_files=input_files,
...                               coordinates=center_coord,
...                               cutout_size=cutout_size,
...                               lite=False)
>>> cutout_asdf_full = asdf_cutout_full.asdf_cutouts[0]
>>> cutout_asdf_full.info()
root (AsdfObject)
├─asdf_library (Software)
│ ├─author (str): The ASDF Developers
│ ├─homepage (str): http://github.com/asdf-format/asdf
│ ├─name (str): asdf
│ └─version (str): 4.1.0
├─history (dict)
│ ├─extensions (list)
│ │ ├─[0] (ExtensionMetadata) ...
│ │ ├─[1] (ExtensionMetadata) ...
│ │ └─6 not shown
│ └─entries (list) ...
└─roman (TaggedDict)
  ├─meta (dict) ...
  ├─data (ndarray) ...
  ├─context (ndarray) ...
  ├─err (ndarray) ...
  ├─weight (ndarray) ...
  ├─var_poisson (ndarray) ...
  ├─var_rnoise (ndarray) ...
  ├─var_flat (ndarray) ...
  ├─cal_logs (CalLogs) # Calibration Log Messages ...
  └─individual_image_cal_logs (list) ...
Some nodes not shown.
Image Outputs
Both the FITSCutout and ASDFCutout classes provide methods to normalize the cutout data and write it as an image,
either as a a Image object or a file.
To create cutouts as Image objects, use the get_image_cutouts method. You can provide the following
normalization parameters:
stretch: The stretch function to apply to the image array. Options include “asinh”, “sinh”, “sqrt”, “log”, and “linear”.minmax_percent: Defines an interval for scaling the image based on percentiles. The format is [lower percentile, upper percentile], where pixel values outside this range are clipped. Only one ofminmax_percentandminmax_valueshould be specified.minmax_value: Defines an interval for scaling the image based on values. The format is [min value, max value], where pixel values outside this range are clipped. Only one ofminmax_percentandminmax_valueshould be specified.invert: A boolean value that determines whether the image should be inverted.
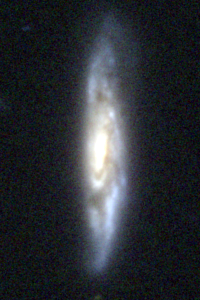
>>> fits_img = fits_cutout.get_image_cutouts(stretch='linear', minmax_percent=[10, 99])[1]
>>> print(fits_img.size)
(200, 300)
>>> fits_img.show()
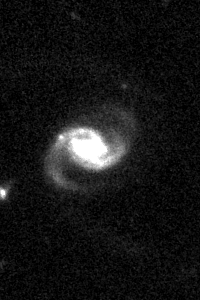
To produce a colorized RGB image, set the colorize parameter to True. Color images require three cutouts,
which will be treated as the R, G, and B channels, respectively.
>>> from astrocut import FITSCutout
>>> from astropy.coordinates import SkyCoord

>>> input_files = ["https://archive.stsci.edu/pub/hlsp/goods/v2/h_nz_sect14_v2.0_drz_img.fits",
...                "https://archive.stsci.edu/pub/hlsp/goods/v2/h_ni_sect14_v2.0_drz_img.fits",
...                "https://archive.stsci.edu/pub/hlsp/goods/v2/h_nv_sect14_v2.0_drz_img.fits"]

>>> center_coord = SkyCoord("189.51522 62.2865221", unit='deg')
>>> cutout_size = [200, 300]

>>> color_image = FITSCutout(input_files, center_coord, cutout_size).get_image_cutouts(colorize=True)[0]
>>> color_image.show()
To write the cutouts to image files, use the astrocut.FITSCutout.write_as_img method. This method returns a list of paths to
the cutout image files. astrocut.FITSCutout.write_as_img takes the same normalization parameters as astrocut.FITSCutout.get_image_cutouts.
To specify the output format of the cutout images, use the output_format parameter.
>>> from PIL import Image
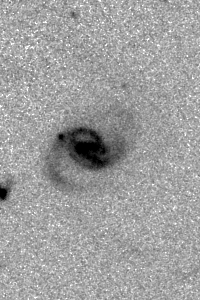
>>> path = fits_cutout.write_as_img(stretch='sqrt', invert=True, output_format='png')
>>> im = Image.open(path[0])
>>> im.show()
By default, the cutouts are written to the current working directory. You can specify a different output directory using the output_dir parameter.
You can also set the prefix of the cutout file paths using the cutout_prefix parameter. The default value is “cutout”.
Spectral Subsets
Astrocut can generate spectral subsets from Roman ASDF spectral files using the
RomanSpectralSubset class. This class is intended for extracting optionally wavelength-limited
spectral data for one or more source IDs in a Roman spectral file.
To create a spectral subset, provide the input spectral file or files, the source IDs to extract, and an optional wavelength range:
>>> from astrocut import RomanSpectralSubset
>>> from pprint import pprint

>>> spectral_files = ["/path/to/roman_spectral.asdf"]  # Path(s) to local ASDF file, URL, or S3 URI
>>> spectral_subset = RomanSpectralSubset(spectral_files=spectral_files,
...                                       source_ids=[420007, 420022],
...                                       wl_range=(1.0, 2.0),
...                                       lite=True)
The lite parameter controls the size of the subset and how much of the original ASDF tree is preserved:
lite=True(default): The subset data only includes the “wl”, “flux”, and “flux_error” arrays. All original metadata is preserved, but all other data arrays and top-level keys from the original file are omitted from the subset.lite=False: The subset includes all data and metadata from the original ASDF file(s), with all arrays that match the dimensions of thewlarray being sliced to the subset shape if awl_rangewas specified. The full tree structure and metadata from the original file(s) are preserved.
The resulting RomanSpectralSubset object can be used to access the subset data and metadata.
The subset_data attribute is a dictionary that stores the subset data keyed by input filename and source ID.
The get_asdf_subsets method returns the subsets as AsdfFile objects in memory,
and the write_as_asdf method writes the subsets to ASDF files on disk and returns a list
of paths to the output files. Both methods support filtering the subsets by source ID and input file, as well as grouping the
subsets in different ways. They accept the following parameters:
source_ids: A list of source IDs to include in the output. If None, all source IDs will be included.spectral_files: A list of input spectral files to include in the output. If None, all input files will be included.group_by: Controls how subsets are grouped in anAsdfFileobject in memory or in an output file.group_by='source_file': Groups subsets by source ID and input file, resulting in one subset object per source ID per input file. In memory, these subsets are returned in a dictionary keyed by deterministic string keys, and each key maps to one unique(input_file, source_id)pair. Useget_source_file_keysto retrieve the valid keys and their(input_file, source_id)mappings.group_by='file': Groups all subsets from each input file together, resulting in one subset object per input file.group_by='combined': Combines all subsets from all input files into a single subset object. See the Spectral Subset File Formats for more details on the structure of subset objects.
>>> asdf_cut = spectral_subset.get_asdf_subsets(source_ids=[420007, 420022], group_by='file')[spectral_files[0]]
>>> pprint(asdf_cut['roman']['data'])
 {420007: {'flux': array([5.37157113e-17, 5.27060112e-17, 5.25740574e-17, 5.26136996e-17,
        5.16123888e-17, 4.95479633e-17, 4.80292887e-17]),
            'flux_error': array([2.50778703e-20, 2.46148251e-20, 2.43618767e-20, 2.41538018e-20,
        2.37139925e-20, 2.30359954e-20, 2.24894059e-20]),
            'wl': array([881.42062338, 884.32981611, 887.24861084, 890.17703926,
        893.11513318, 896.06292449, 899.0204452 ])},
  420022: {'flux': array([5.37157113e-17, 5.27060112e-17, 5.25740574e-17, 5.26136996e-17,
        5.16123888e-17, 4.95479633e-17, 4.80292887e-17]),
            'flux_error': array([2.50778703e-20, 2.46148251e-20, 2.43618767e-20, 2.41538018e-20,
        2.37139925e-20, 2.30359954e-20, 2.24894059e-20]),
            'wl': array([881.42062338, 884.32981611, 887.24861084, 890.17703926,
        893.11513318, 896.06292449, 899.0204452 ])}}
Multiprocessing
RomanSpectralSubset and write_as_asdf accept a max_workers parameter
that controls file-level multiprocessing during subset generation and writing, respectively.
The behavior of this parameter is as follows:
max_workers=None(default): Automatically choose a worker count based on available CPUs and number of jobs.max_workers=1: Process or write files sequentially.max_workers>1: Process or write files in parallel with that worker count.
Subset Generation Guidelines
Parallel processing can significantly speed up subset generation, but its effectiveness depends primarily on the number of input spectral files and their size. The number of sources requested in the subset has minimal impact on runtime. Even when requesting a small subset, the full input file must still be accessed internally.
Here are some general guidelines for when multiprocessing is recommended during subset generation:
1 Input File: Serial execution (
max_workers=1) is recommended; parallel execution adds overhead that exceeds performance gains.2 Input Files: Helpful for large files (≥3000 sources), but little or no benefit for smaller files (≤1000 sources).
3-8 Input Files: Multiprocessing is generally beneficial, especially for medium to large files.
8+ Input Files: Multiprocessing is recommended, except for very small files (≤300 sources).
Write Performance Guidelines
When writing spectral subsets to disk using write_as_asdf, parallelization effectiveness
depends on the number of files being written and whether output validation is enabled.
When validate_output=True is set during write operations, validation significantly increases runtime, regardless of
whether execution is serial or parallel. Consider disabling validation for large batch writes if validation can be performed
separately or selectively.
Here are some general guidelines for when multiprocessing is recommended during writing:
When
validate_output=True: - < 5,000 Files: Serial execution (max_workers=1) is recommended; parallel execution adds overhead that exceeds performance gains. - > 5,000 Files: Multiprocessing provides modest speedup.When
validate_output=False: - < 1,000 Files: Serial execution (max_workers=1) is recommended; parallel execution adds overhead that exceeds performance gains. - 1,000 - 5,000 Files: Multiprocessing provides modest speedup. - > 5,000 Files: Multiprocessing provides significant speedup.
Cube Cutouts
Astrocut enables the creation of cutouts from image cube files, including TESS full-frame images (FFIs). Supported products are from the Science Processing Operations Center (SPOC).
To begin, the CubeFactory class constructs a large image cube from a list of FFI files, optimizing the
writing process for efficiency. The TessCubeCutout class then extracts the desired cutout and generates a target pixel file (TPF)
similar to those produced by the TESS Mission.
For a small number of cutouts, the TESSCut web service may suit your needs.
Note
Starting in version 2.0.0, the ability to create image cubes and cube cutouts using TESS Image Calibration (TICA) full frame images has been removed. Individual TICA full-frame images will remain available from the MAST TICA homepage.
Making Image Cubes
Important
Time-Memory Trade-off
Making an image cube is a simple operation, but comes with an important time-memory trade-off.
The max_memory argument determines the maximum memory in GB that will be used
for the image data cube while it is being built. This is the amount of memory required
only for the data cube, so is somewhat smaller than the total amount of memory needed
for the program to run. You should never set it to your system’s total memory.
Because of this, cube files do not need to allocate their total size in
memory all at once. Instead, a smaller memory allocation can be used while
the cube file is constructed; however, this will significantly increase the
execution time as bytes are swapped into and out of the memory allocation
being used. The default value of 50 GB was chosen because it fits all of the
TESS FFIs from a single Prime Mission Sector (Sectors 1-26); however, in the
current TESS Extended Mission 2, where 6 times more FFIs are observed per Sector
(compared to the number of FFIs observed per Sector in the Prime Mission), 50 GB
is not enough space to hold all of the FFIs in memory, and the cubes will be
written in multiple blocks. With the default settings, on a system with 64 GB of
memory, it takes about 3 hours to build a single cube file. On a system with less
memory or where max_memory is set to a value less than 50 GB, more passes
through the list of files are required, and the time to create a cube can increase
significantly.
Assuming that you have set of calibrated TESS FFI files stored locally, you can
create a cube using the make_cube method. By default, make_cube
runs in verbose mode and prints out progress; setting the verbose parameter to False will silence
all output.
Note, you can only make cubes from a set of FFIs that were observed in the same sector, camera, and CCD.
The output image cube file format is described in the Astrocut File Formats page.
>>> from astrocut import CubeFactory
>>> from glob import glob
>>> from astropy.io import fits

>>> my_cuber = CubeFactory()
>>> input_files = glob("data/*ffic.fits")

>>> cube_file = my_cuber.make_cube(input_files)
Completed file 0
Completed file 1
Completed file 2
.
.
.
Completed file 142
Completed file 143
Total time elapsed: 46.42 sec
File write time: 8.82 sec

>>> print(cube_file)
img-cube.fits

>>> cube_hdu = fits.open(cube_file)
>>> cube_hdu.info()
Filename: img-cube.fits
No.    Name      Ver    Type      Cards   Dimensions   Format
0  PRIMARY       1 PrimaryHDU      28   ()
1                1 ImageHDU         9   (2, 144, 2136, 2078)   float32
2                1 BinTableHDU    302   144R x 147C   [24A, J, J, J, J, J, J, D, 24A, J, 24A, 24A, J, J, D, 24A, 24A, 24A, J, D, 24A, D, D, D, D, 24A, 24A, D, D, D, D, D, 24A, D, D, D, D, J, D, D, D, D, D, D, D, D, D, D, D, D, J, J, D, J, J, J, J, J, J, J, J, J, J, D, J, J, J, J, J, J, D, J, J, J, J, J, J, D, J, J, J, J, J, J, D, J, J, J, J, J, J, J, J, 24A, D, J, 24A, 24A, D, D, D, D, D, D, D, D, J, J, D, D, D, D, D, D, J, J, D, D, D, D, D, D, D, D, D, D, D, D, 24A, J, 24A, 24A, J, J, D, 24A, 24A, J, J, D, D, D, D, J, 24A, 24A, 24A]
Making Cutout Target Pixel Files
Astrocut can generate cutout target pixel files from TESS cubes using the astrocut.TessCubeCutout class and return the results
in memory or as a file, depending on the user’s preference. The cutout target pixel file format is described in the
Astrocut File Formats page.
The astrocut.TessCubeCutout class takes the following parameters:
input_files: A list of input cube files in the expected format. These can be local file paths, URLs, or S3 URIs.coordinates: The coordinates at the center of the cutout.cutout_size: The size of the cutout in pixels or angular units.fill_value: If the cutout footprint falls outside of the image, this value will be used to fill the missing pixels.
>>> from astrocut import TessCubeCutout
>>> from astropy.io import fits

>>> cube_file = "img-cube.fits"
>>> cube_cutout = TessCubeCutout(cube_file,
...                              coordinates="251.51 32.36",
...                              cutout_size=5)
The resulting TessCubeCutout object can be used to access the cutout data and metadata. The cutouts_by_file attribute
is a dictionary that stores the individual cutouts as a list of CubeCutoutInstance objects by input filename.
The CubeCutoutInstance object contains the cutout data, shape, world coordinate system (WCS), and other helpful properties.
The tpf_cutouts_by_file attribute is a dictionary that stores the cutouts as a list of HDUList objects by input filename.
These objects are in the format of target pixel files and can be used to access cutout data and metadata in the HDU header.
The tpf_cutouts attribute is a list of cutouts as HDUList objects in the format of target pixel files.
>>> tpf_cutout = cube_cutout.tpf_cutouts[0]
>>> tpf_cutout.info()
Filename: (No file associated with this HDUList)
No.    Name      Ver    Type      Cards   Dimensions   Format
0  PRIMARY       1 PrimaryHDU      42   ()
1  PIXELS        1 BinTableHDU    222   144R x 12C   [D, E, J, 25J, 25E, 25E, 25E, 25E, J, E, E, 38A]
2  APERTURE      1 ImageHDU        45   (5, 5)   float64
To write the cutout target pixel files to FITS files, use the write_as_tpf method.
This method returns a list of paths to the cutout TPF files. The file names will be in the pattern of
“<cube_file_base>_<ra>_<dec>_<cutout_size>_astrocut.fits”.
>>> from astropy.io import fits

>>> path = cube_cutout.write_as_tpf()
>>> print(path)
['img_251.51_32.36_5x5_astrocut.fits']

>>> with fits.open(path[0]) as hdul:
...     hdul.info()
Filename: img_251.51_32.36_5x5_astrocut.fits
No.    Name      Ver    Type      Cards   Dimensions   Format
0  PRIMARY       1 PrimaryHDU      42   ()
1  PIXELS        1 BinTableHDU    222   144R x 12C   [D, E, J, 25J, 25E, 25E, 25E, 25E, J, E, E, 38A]
2  APERTURE      1 ImageHDU        45   (5, 5)   float64
By default, the cutouts are written to the current working directory. You can specify a different output directory using the
output_dir parameter.
Multithreading
Using cube files stored on the cloud allows you the option to implement multithreading to improve cutout generation speed. See below for a multithreaded example, using a TESS cube file stored on AWS.
To use multithreading for cloud-based cutouts, set the threads argument in cube_cut to the number of threads you want to use.
Alternatively, you can set threads to "auto", which will set the number of threads based on the CPU count of your machine.
Note that Total Time results may vary from machine to machine.
>>> from astrocut import TessCubeCutout
>>> from astropy.coordinates import SkyCoord

>>> coord = SkyCoord(217.42893801, -62.67949189, unit="deg", frame="icrs")
>>> cutout_size = 30
>>> cube_file = "s3://stpubdata/tess/public/mast/tess-s0038-2-2-cube.fits"

>>> cube_cutout = TessCubeCutout(cube_file,
...                              coordinates=coord,
...                              cutout_size=cutout_size,
...                              verbose=True,
...                              threads="auto")
DEBUG: Coordinates: <SkyCoord (ICRS): (ra, dec) in deg
  (217.42893801, -62.67949189)> [Cutout]
DEBUG: Cutout size: [30 30] [Cutout]
DEBUG: Using WCS from row 1852 out of 3705 [CubeCutout]
DEBUG: Image cutout cube shape: (3705, 30, 30) [CubeCutout]
DEBUG: Uncertainty cutout cube shape: (3705, 30, 30) [CubeCutout]
DEBUG: Cutout center coordinate: 217.42893801, -62.67949189 [CubeCutout]
DEBUG: Maximum distance between approximate and true location: 0.0 [CubeCutout]
DEBUG: Error in approximate WCS (sigma): 0.0000 [CubeCutout]
DEBUG: Total time: 3.94 sec [CubeCutout]
The same call made without multithreading enabled will result in a longer processing time, depending on the cutout size. Note that multithreading is disabled by default.
>>> cube_cutout = TessCubeCutout(cube_file,
...                              coordinates=coord,
...                              cutout_size=cutout_size,
...                              verbose=True)
DEBUG: Coordinates: <SkyCoord (ICRS): (ra, dec) in deg
  (217.42893801, -62.67949189)> [Cutout]
DEBUG: Cutout size: [30 30] [Cutout]
DEBUG: Using WCS from row 1852 out of 3705 [CubeCutout]
DEBUG: Image cutout cube shape: (3705, 30, 30) [CubeCutout]
DEBUG: Uncertainty cutout cube shape: (3705, 30, 30) [CubeCutout]
DEBUG: Cutout center coordinate: 217.42893801, -62.67949189 [CubeCutout]
DEBUG: Maximum distance between approximate and true location: 0.0 [CubeCutout]
DEBUG: Error in approximate WCS (sigma): 0.0000 [CubeCutout]
DEBUG: Total time: 9.65 sec [CubeCutout]
Footprint Cutouts
Astrocut can create cutouts without input files by matching the cutout’s footprint to the footprints of available data products on the cloud.
The TessFootprintCutout class generates cutouts from TESS image cube files stored in MAST’s AWS Open Data Bucket.
Simply provide the target coordinates and cutout size, and the class will match the cutout’s footprint to the footprints
of available cube files on the cloud. A cutout target pixel file will be generated for each matching cube file.
To restrict the cutouts to specific sectors, use the sequence parameter with a sector number or a list of sector numbers.
If sequence is set to None, cutouts will be returned for all matching cube files.
The resulting cutouts can be returned in memory or as a file, depending on the user’s preference. The cutout target pixel file format is described in the Astrocut File Formats page.
>>> from astrocut import TessFootprintCutout

>>> fp_cutout = TessFootprintCutout(
...         coordinates='83.40630967798376 -62.48977125108528',
...         cutout_size=10,
...         sequence=[1, 2])  # TESS sectors
>>> fp_cutout.write_as_tpf()
The resulting TessFootprintCutout object can be used to access the cutout data and metadata. The cutouts_by_file attribute
is a dictionary that stores the individual cutouts as a list of CubeCutoutInstance objects by input filename.
The CubeCutoutInstance object contains the cutout data, shape, world coordinate system (WCS), and other helpful properties.
The tpf_cutouts_by_file attribute is a dictionary that stores the cutouts as a list of HDUList objects by input filename.
These objects are in the format of target pixel files and can be used to access cutout data and metadata in the HDU header.
The tpf_cutouts attribute is a list of cutouts as HDUList objects in the format of target pixel files.
>>> tpf_cutout = fp_cutout.tpf_cutouts[0]
>>> tpf_cutout.info()
Filename: (No file associated with this HDUList)
No.    Name      Ver    Type      Cards   Dimensions   Format
  0  PRIMARY       1 PrimaryHDU      55   ()
  1  PIXELS        1 BinTableHDU    144   1282R x 12C   ['D', 'E', 'J', '100J', '100E', '100E', '100E', '100E', 'J', 'E', 'E', '38A']
  2  APERTURE      1 ImageHDU        80   (10, 10)   int32
To write the cutout target pixel files to FITS files, use the write_as_tpf method. This method
returns a list of paths to the cutout TPF files.
>>> from astropy.io import fits

>>> path = fp_cutout.write_as_tpf()[0]
>>> print(path)
tess-s0001-4-4_83.4063097_-62.4897713_10-x-10_astrocut.fits

>>> with fits.open(path) as hdul:
...     hdul.info()
Filename: tess-s0001-4-4_83.4063097_-62.4897713_10-x-10_astrocut.fits
No.    Name      Ver    Type      Cards   Dimensions   Format
  0  PRIMARY       1 PrimaryHDU      57   ()
  1  PIXELS        1 BinTableHDU    146   1282R x 12C   [D, E, J, 100J, 100E, 100E, 100E, 100E, J, E, E, 38A]
  2  APERTURE      1 ImageHDU        82   (10, 10)   int32
By default, the cutouts are written to the current working directory. You can specify a different output directory using the
output_dir parameter.
Additional Cutout Processing
Path-based Cutouts
The center_on_path function allows the user to take one or more Astrocut cutout
TPF(s) and create a single cutout, centered on a moving target that crosses through
the file(s). The user can optionally pass in a target object name and FFI WCS object.
The output target pixel file format is described on the Astrocut File Formats page.
This example starts with a path, and uses several TESScut services
to retrieve all of the inputs for the center_on_path function. We also use the helper function
path_to_footprints that takes in a path table, cutout size, and WCS object, and returns the
cutout location/size(s) necesary to cover the entire path.
>>> import astrocut
>>> import requests
>>> from astropy.table import Table
>>> from astropy.coordinates import SkyCoord
>>> from astropy.time import Time
>>> from astropy.io import fits
>>> from astropy import wcs
>>> from astroquery.mast import Tesscut
>>> # The moving target path
>>> path_table = Table({"time": Time([2458468.275827604, 2458468.900827604, 2458469.525827604,
... 2458470.150827604, 2458470.775827604], format="jd"),
... "position": SkyCoord([82.22813, 82.07676, 81.92551, 81.7746, 81.62425],
... [-1.5821,- 1.54791, -1.5117, -1.47359, -1.43369], unit="deg")
... })
>>> # Getting the FFI WCS
>>> resp = requests.get(f"https://mast.stsci.edu/tesscut/api/v0.1/ffi_wcs?sector=6&camera=1&ccd=1")
>>> ffi_wcs = wcs.WCS(resp.json()["wcs"], relax=True)
>>> print(ffi_wcs)
WCS Keywords
Number of WCS axes: 2
CTYPE : 'RA---TAN-SIP' 'DEC--TAN-SIP'
CRVAL : 86.239936828613 -0.87476283311844
CRPIX : 1045.0 1001.0
PC1_1 PC1_2 : 0.0057049915194511 7.5332427513786e-06
PC2_1 PC2_2 : -0.00015248404815793 0.005706631578505
CDELT : 1.0 1.0
NAXIS : 2136 2078
>>> # Making the regular cutout (using astroquery)
>>> size = [15,15]
>>> footprints = astrocut.path_to_footprints(path_table["position"], size, ffi_wcs)
>>> print(footprints)
[{'coordinates': <SkyCoord (ICRS): (ra, dec) in deg
(81.92560877, -1.50880833)>, 'size': (37, 125)}]
>>> manifest = Tesscut.download_cutouts(**footprints[0], sector=6)
Downloading URL https://mast.stsci.edu/tesscut/api/v0.1/astrocut?ra=81.92560876541987&dec=-1.5088083330171362&y=37&x=125&units=px§or=6 to ./tesscut_20210707103901.zip ... [Done]
Inflating...
>>> print(manifest["Local Path"][0])
./tess-s0006-1-1_81.925609_-1.508808_125x37_astrocut.fits
# Centering on the moving target
>>> mt_cutout_fle = astrocut.center_on_path(path_table, size, manifest["Local Path"], target="my_asteroid",
... img_wcs=ffi_wcs, verbose=False)
>>> cutout_hdu = fits.open(mt_cutout_fle)
>>> cutout_hdu.info()
Filename: ./my_asteroid_1468.9120483398438-1470.1412353515625_15-x-15_astrocut.fits
No. Name Ver Type Cards Dimensions Format
0 PRIMARY 1 PrimaryHDU 56 ()
1 PIXELS 1 BinTableHDU 152 60R x 16C [D, E, J, 225J, 225E, 225E, 225E, 225E, J, E, E, 38A, D, D, D, D]
2 APERTURE 1 ImageHDU 97 (2136, 2078) int32
Combining Cutouts
The CutoutsCombiner class allows the user to take one or more Astrocut cutout
FITS files (as from fits_cut) with a shared WCS object, and combine them into
a single cutout. This means that you should request the same cutout size in all of the images you want to combine.
The default setting combines the images with a mean combiner, such that every combined pixel is the mean of all
pixels that have data at that point. This mean combiner is made with the build_default_combine_function,
which takes the input image HDUs and allows the user to specify a null data value (default is NaN).
Users can write a custom combiner function, either by directly setting the
combine_images function, or by writing a custom combiner function builder
and passing it to the build_img_combiner function. The main reason to
write a function builder is that the combine_images function must work
only on the images being combined; any usage of header keywords, for example, must be set in that
function. See the build_default_combine_function for an example of how this works.
>>> import astrocut

>>> from astropy.coordinates import SkyCoord

>>> fle_1 = 'hst_skycell-p2381x05y09_wfc3_uvis_f275w-all-all_drc.fits'
>>> fle_2 = 'hst_skycell-p2381x06y09_wfc3_uvis_f275w-all-all_drc.fits'

>>> center_coord = SkyCoord("211.27128477 53.66062066", unit='deg')
>>> size = [30,50]

>>> cutout_1 = astrocut.fits_cut(fle_1, center_coord, size, extension='all',
...                     cutout_prefix="cutout_p2381x05y09", verbose=False)
>>> cutout_2 = astrocut.fits_cut(fle_2, center_coord, size, extension='all',
...                     cutout_prefix="cutout_p2381x06y09", verbose=False)

>>> plt.imshow(fits.getdata(cutout_1, 1))
>>> plt.imshow(fits.getdata(cutout_2, 1))
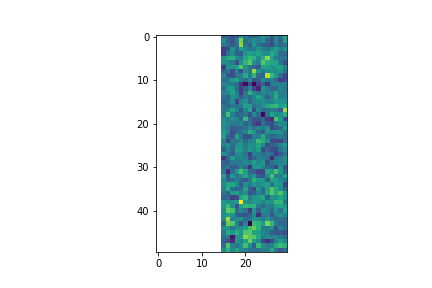
>>> combined_cutout = astrocut.CutoutsCombiner([cutout_1, cutout_2]).combine("combined_cut.fits")
>>> plt.imshow(fits.getdata(combined_cutout, 1))
All of the combining can be done in memory, without writing FITS files to disk as well.
>>> import astrocut

>>> from astropy.coordinates import SkyCoord

>>> fle_1 = 'hst_skycell-p2381x05y09_wfc3_uvis_f275w-all-all_drc.fits'
>>> fle_2 = 'hst_skycell-p2381x06y09_wfc3_uvis_f275w-all-all_drc.fits'

>>> center_coord = SkyCoord("211.27128477 53.66062066", unit='deg')
>>> size = [30,50]

>>> cutout_1 = astrocut.fits_cut(fle_1, center_coord, size, extension='all',
...                     cutout_prefix="cutout_p2381x05y09", memory_only=True)[0]
>>> cutout_2 = astrocut.fits_cut(fle_2, center_coord, size, extension='all',
...                     cutout_prefix="cutout_p2381x06y09", memory_only=True)[0]

>>> plt.imshow(cutout_1[1].data)
>>> plt.imshow(cutout_2[1].data)
>>> combined_cutout = astrocut.CutoutsCombiner([cutout_1, cutout_2]).combine(memory_only=True)
>>> plt.imshow(combined_cutout[1].data)